Making of Natural Androgynous look...Just Skin and Just Jumper
Tags:
Alexander Wang
androgynous
Beauty - Face
By Terry
Chantecaille
Fashion - Autumn
Fashion - Spring
Fashion - Winter
La Prairie
makeup
Shopping - Beauty
Shopping - Fashion
Shu Uemura
True Religion
This post reflects my own personal interpretation/styling/make-up on fashion.
And I, myself, am not affiliated with any make-up/fashion companies.
That is, you need not buy all the things that I wear/own to get the exact look.
You can always mix and match with what you have got in your wardrobe and have fun! :)

And I, myself, am not affiliated with any make-up/fashion companies.
That is, you need not buy all the things that I wear/own to get the exact look.
You can always mix and match with what you have got in your wardrobe and have fun! :)
 |
| Claudiu Mardare <Androgynous> |
I don't know why, but I quite like an androgynous/boyish look especially during A/W season. Maybe because of the colours ( darker ) that I tend to wear?
There is definitely something about an androgynous/boyish look! Obviously this look has
always been hot on the runway. Natural yet a more chic, modern, and defined look.
always been hot on the runway. Natural yet a more chic, modern, and defined look.
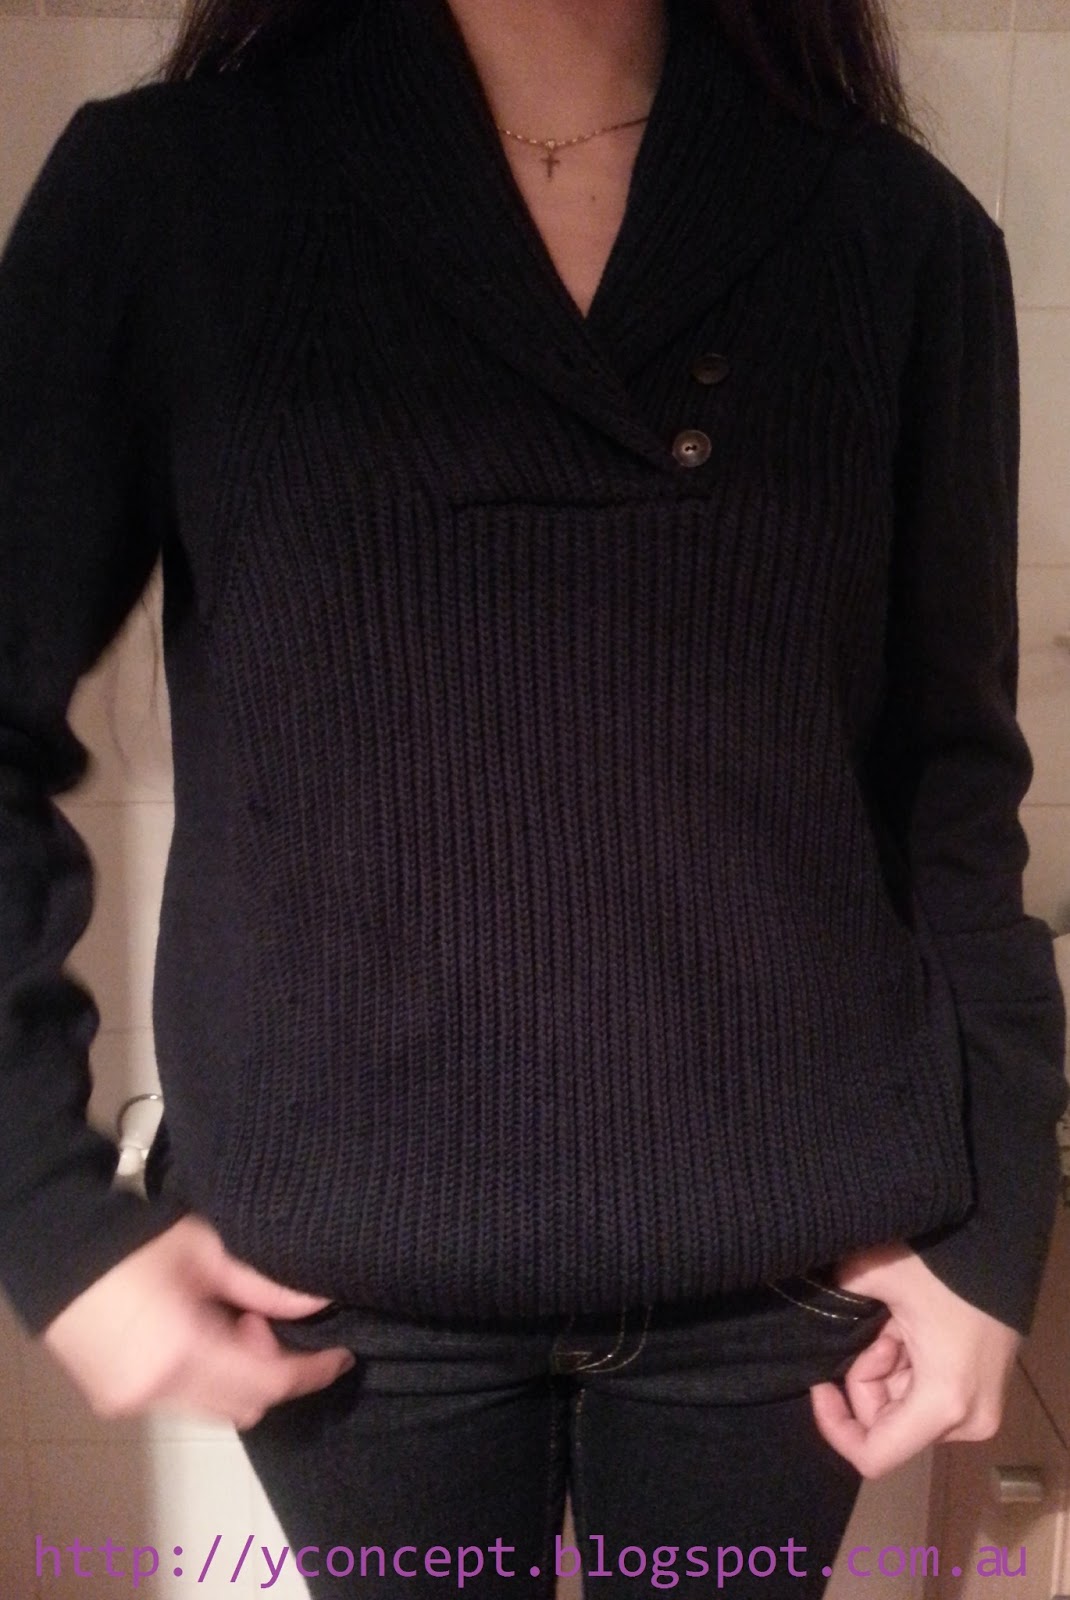
I couldn't go wrong with this, my Alexander Wang jumper. I could just go for a natural look, but I felt like doing something different! :P You know, we all have the times when we get bored doing the same things over and over ;). LOL. And I tend to like to play with my make-up and fashion more during the cold seasons just to lift my feeling up a bit! ( If you have been reading my other posts, you know how much I love hot/warm weather! :( )
Anyhow, I didn't want to go too far, I just wanted to keep my androgynous/boyish look to a moderate degree. Of course, you can add more products on top of the products used below or even replace them with the products that you normally use :). Think about your make-up routine, and apply it for natural androgynous look based on your interpretation! :)
STEP 1
: So to start off with a base, I cracked out an expensive product and used Chantecaille's Biodynamic Lifting Mask. My man and I were going to catch up with our friends, and we weren't sure when we would be coming home. So I only knew it was going to be "late". LOL. So I had to treat my skin before so it would not get stressed from night out! And this way, it would hold my make-up longer since I was not piling up loads of products :P.
STEP 2
: For a dewy natural finish, I used La Prairie's Liquid Soft Glow on high points of my face first. Then, I put on Chantecaille's Just Skin Tinted Moisturizer. Just be aware, this tinted moisturizer does not really give you much coverage, but a very nice glow and evening out the skin tone overall. So if you need coverage, then I suggest, By Terry's Tinted Moisturizer or By Terry's Cover-Expert Foundation. For me, Chantecaille's Tinted Moisturizer was hydrating enough since I have combination skin.
STEP 3
: For the eyes and eyebrows, I just kept everything minimal and natural yet defined. Not harsh yet bold and natural eyebrows, not loud yet defined eyes. So I just popped on Lancome's Doll Lashes mascara and Shu Uemura's eyebrow manicure. I did not need to fill in my eyebrows since I have already full eyebrows :). I also did not use any eye shadow (you can if you want, I just did not bother XD.) because I just wanted to create a no make-up natural androgynous look this time. But obviously if you have a redness on your eyelids, you will need to neutralise it and give it a bit of definition with eye shadows. In my case, I already have some natural shadows on my eyelids, so I did not feel that I really needed to put on eye shadow. Before mascara, you can also put some eyeliner if you desire. I actually put on a long lasting Chantecaille's Gel Liner. Staying power is very important for me since my eyelids can get quite oily after a while. And I never had a problem with this eye liner in summer, so I used this again this time! :)
STEP 4
: As for contouring, I recommend you using a matte bronzer like Dior's. You do not necessarily need to put on a blush unless you really want to. It is all about giving good definition! :)
STEP 5
: If you already have full defined lip lines, then you can skip defining your lip lines. Make sure you keep everything natural looking though. If you decide to use a lipstick, then try something matte rather than shimmery or glossy. Follow your natural lip colour when you choose a colour. Please do not go for nude colours simply because it is popular.
STEP 6
: Hair Hair Hair! Sorry about my messy hair on the picture! My hair was still wet and in the process of getting dried, so looking a bit frizzy! :/ You can pull your hair back and tie it up or down like I did, you can also try loose low pony tail. If you have a short hair, you are lucky! Just blow dry your hair and give it some volume! :)
And for the outfits, you can go for handsome suits, formal clothes, or just like me, just True Religion jeans and Alexander Wang jumper!
디올 디올스킨 누드 탠